VOIDBREAKER 02
Hello again drifter. Been toiling away feverishly at the bench lately working on these Kill Teams. Holidays directly around the corner, the time has been scarce. Waiting patiently for our physical copy of the new Kill Team rule book, Fury and I are ready to get in some game reps. Here the busy bug was shared so we’ve hardly had the time for play. I’ve had a portion of a few evenings to get out the build ideas I end up daydreaming about. Since the last VOIDBREAKER I switched over to the Tyranid kill team. The bits started rolling in and the little monsters were calling my name. Mabey it’s just the Nid-vember vibe, call me compelled.
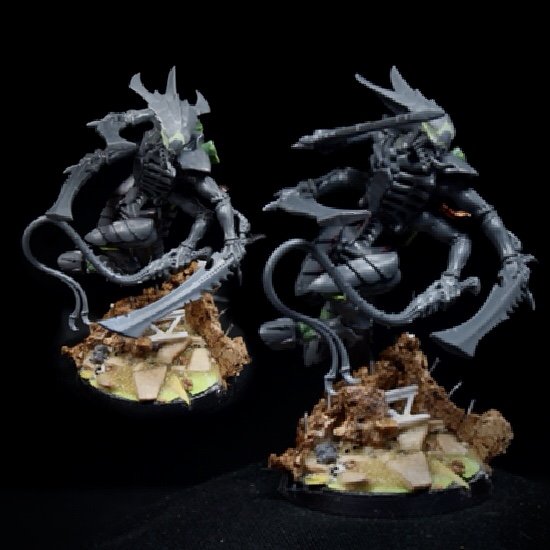
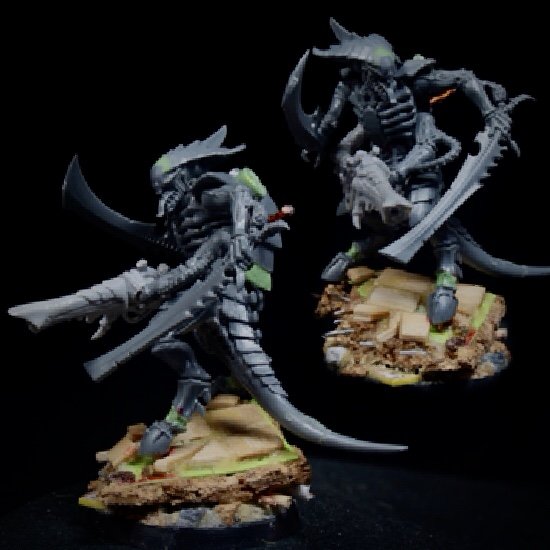
Like i said in the last article, I was inspired by @craftsmanjono and his additions of the human sized skull bits to Tyranid Warrior heads. I didn’t find it too difficult to remove the non skull shaped portion in the front of the Warrior head and top jaw section with a slice of a razor saw. Clipping the back of the skull bit to fit the gap where needed I glue the skull in nestled above the attached jaw bit. A pretty simple fill job with green stuff and Magic Sculpt. I tried to modulate the upper cheek bone areas of the skull to run seamlessly into Warrior head and fill in the eye cavities so that I could smooth them into the head for a more Xenomorph look.
Pretty much the same method on the Genestealers. A lot more space to fill on these, but it’s a drastic change to the original, Not the biggest fan of the Genestealer model to say the least. Actually completely stoked to start painting these!
I knew I was going to want to change the pose and general anatomy of my Warriors, so I decided to lengthen the legs and stretch the torso a bit. The legs were going to need a bit of work at the hips as well unless I wanted them in the same boring assed pose.
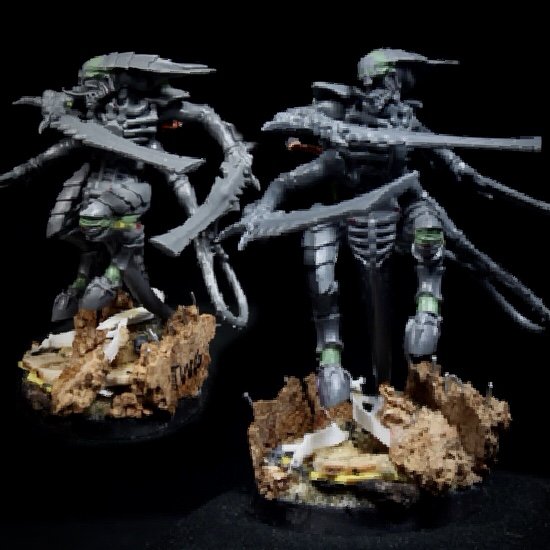
A few of the provided warrior legs needed a bit of help. I thought these things were apex predators, they could at least bend a knee. I sliced out a notch at the back of the middle portion of the leg to remove enough material so it looked like the leg was drawn in a bit. Then I added a bit of plastic card to mock the muscle structure. I put all these pieces together with plastic cements. When these placeholders are dry I can sculpt over them to make it look like a real leg. Or a real leg on a fantasy creature. I do this a lot because I suck at sculpting (or it frustrates me) Same general idea on the back plates. Cut it out of plastic, then sculpt over it!
I snipped the legs off at the hooves and stretched their connections by pinning the hooves back in with a bit of thicker gage copper wire. The added wire sections were all cut to the same length to add about 3mm. I also ran a length of this copper wire through the pelvis bit of the warriors lower torso. That way I could attach the upper legs to the pins and pose them at my will. I drill out the pelvis a bit with a larger drill bit so that there was enough play in the socket for the added legs to move freely enough to pose and not require too much filler. I also added a pin to attach the upper torso. I made this pin a bit longer to force the torso up a bit, making the creature slightly taller.
I filled most of these connections with the green stuff and Magic Sculpt mixture and started in on the additional armor plates these beasts were going to need to cover the gaps in their backs. I cut their basic shapes out of some medium thickness plastic card and glued them into place with plastic cement. When these structures were dry I sculpted over them with the green stuff mixture. I’m starting to realize this is my standard mode of operations when it comes to scratch building any elements in a miniature. I ended up using this method to create the spore chimney details on the Warrior’s backs. I don’t know all the details on what this element is in the lore but the look cool and gross and these monsters were getting some. I wanted a shape that I could make copies of so I could make three sets. I used a craft paper punch to cut a shape from some medium plastic card. This shit was tough. In hindsight, I could have used a thinner plastic sheet to make this part easier, After squeezing out enough shapes, I cut each teardrop diamond shape off the center. I divide those pieces into stacks of 3 and weld them together with thin plastic cement. Next I split a piece in half for each stalk and add them to the vertical edges of the stalks with more plastic glue. When that was dry and firm (at least an hour) I sand any sharp corners down and drill two holes into the structure with my Dremel tool. I soften any plastic fuzzies with some thin plastic cement. Then I fill any of the gaps with that sculpting medium (green stuff/magic sculpt) It’s pretty easy to see what additional sculpting is needed after all the gaps all smoothed out.
FAILURES
ARE NO DOUBT INEVITABLE
I started this kill team group with an idea to make some spore stalk type bits to press-mold. I wanted to be able to duplicate a cool bit on all these pieces. Sadly after making a few shitty molds and breaking the sculpted masters (pictured here) I realized I wouldn’t be able to pull it off cleanly enough for the dreamed effect. The experience sculpting some of these pieces definitely helped when solving the Xenomorph like stalk issues I’d have later. I combined the techniques of blocking in shapes with wire and plastic card and sculpting over that, it was just way easier this time. Lesson learned.
I used some 16gage copper wire to form the lower stalks on the Warriors backs. These are complete nods to some early H.R. Ginger artwork of the Xenomorph. These designs seem to all include 3 sets of stalks on the back of the creature but I was going to limit mine a bit. It’s a “different” intellectual property after all. After trimming and bending the wire to the desired position I add a few layers of thick super glue to each end. Each dried layer of super glue ends up forming a rough bulb shape that I’ll reinforce later with some green stuff
I used the same method on the rear stalks for the Genestealer backs. The front stalks were a bit different. After pinning the copper wires I added a length of guitar string to the backs with some super glue. I also prepared a few slices of plastic rod by marking the tube and carefully cutting it with a razor saw. After each piece was trimmed, I gently pressed them into a rough ellipse. I placed each piece of tube around the top of the front stalks and attached them with some medium super glue on the inner ring. When these were dry I sanded the sharper edges with some sanding sticks and filled the gaps with my green stuff mixture. I tried to make the added ring here look like one piece with the main stalk showing the texture of the guitar string on the back shaft of whatever alien butthole-weiner grows out of this Genestealers back. These might be a bitch to paint.
Bases on these bugs are real actively simple, loads of cork to simulate broken concrete with paper clip re-bar and some trimmed coffee sticks to represent shattered tile flooring. The silent internal narrative happening here is a ruined medical research facility that might have a little connection to these fuckin’ ninja grass-hoppers. I’ll put some details on their construction up later if there is any interest. Let me know.
Still a few small things to do here before paint but I told myself I’d have something post-able in two weeks. So here they are. Drop me a line and let me know what you think. Next its back on the Harlequin Troupe. Ive got a good system down for putting each of those characters together, so they should go pretty quick once i get stuck in on them. Next time I’ll share all the build details with the players and go over the plans for each of the paint schemes (I swear, there are a few) You can catch me over on Instagram @witchhammerstudio for quick pictures. I’ll be uploading two more backlog posts so check back here for those. Mabey the next VOIDBREAKER should be about how I go back in and scrape mold lines after the miniature is completely built. Take care champions and ill see you on the other side.


